As we say goodbye to Google’s much loved Universal Analytics, we now need to adjust to life with GA4.
It all kinda looks the same, but feels very different. Especially in how we set up goals.
Why this method?
Most marketers tend to use the Contact Form Submission trigger in Google Tag Manager, as it’s quite easy to set up (especially whilst setting up other tags/triggers there).
The beauty of having a contact form redirect to a thank you page upon completion is that the page is only viewed when someone successfully completes the contact form.
Whereas the standard Contact Form Submissions trigger will fire whenever someone clicks the Send/Submit button, even if the form has not been successfully filled.
So, this is a more reliable way to track contact form submissions on your website.
Instructions
Step 1: Click on Admin, in the bottom left corner of your screen.
Step 2: Click on Events
Step 3: Click “Create event”.
Step 4: Click “Create”.
Step 5: Create a custom name for this goal, I usually name it “contact_form”
Then fill the parameter as below.
My thank you page for this website ends with /thank-you/
If your thank you page is different, like /thanks/ or /success/ then you’ll need to adjust the value appropriately.
Step 6: You’ll see your Custom event has been created. Close out of that section and click on to the Conversions tab.
Step 7: Click on “New conversion event”.
Step 8: We need to input our new event name. This has to match exactly what we named our custom event.
In this case, our custom event was called “contact_form”.
If you named your event differently, you’ll have to adjust accordingly.
Step 9: Success! You’ve now created a goal to track a thank you page visit in GA4.
You can now view how many people have successfully completed contact forms and even pull that conversion metric into your Google Ads account.
NOTE: We have found that from time to time, the Google Forwarding Number redirects to another number – especially if the ads associated with that number were paused for a period of time. If you’re going to use the free forwarding number from Google, ensure that you know what the number is and periodically call it to ensure it’s working. For this reason, we’ve stopped using this Google service at Harmonised as misdirected calls could mean hundreds, thousands, even tens of thousnads of dollars in missed opportunities for clients if we don’t pick up on an error fast enough.
For clients with lower budgets, we simply make do with tracking telephone link clicks. For other clients who don’t mind spending money for additional insights, we used a paid call tracking service like Avansar or CallRail.
The Google Forwrading Number is one of the greatest tools up any marketer’s sleeve. It’s completely free and it provides powerful data as to how many confirmed phone calls are being generated by your campaigns.
In Australia, this service will mask your existing phone number with either an 1800 or 1300 number. You don’t have any way of knowing what that number is going to be beforehand.
So, how do we set it up?
Setting up the Conversion
First, we need to set up the Google Forwading Number in Google Ads.
Step 1: Go into “Tools and settings”, then click on “Conversions”.
Step 2: Click on the blue button “New conversion action”
Step 3: Click the “Phone calls” box
Step 4: Select “Call to a phone number from your website” and click continue.
Step 5: Fill in the details for your conversion. You can call the Conversion name whatever you’d like.
Make sure that the phone number matches the phone number on your website exactly.
I personally also like to make sure phone calls are registered after 10 seconds to make sure every call is being registered. The default settings are 60 seconds, which I personally think is too long and can mean that you’re not taking the credit for some calls.
Step 6: Next, you’re going to be asked how you want to install your tag. In this example, we’re going to select “Use Google Tag Manager” to get the details needed to set this up in Google Tag Manager.
Setting up the tag in GTM
Step 7: Google Ads will now provide us the necessary information to copy and paste over to Google Tag Manager (Conversion ID and Conversion label), so keep this window open for now.
Step 8: Go into Google Tag Manager and create a new tag.
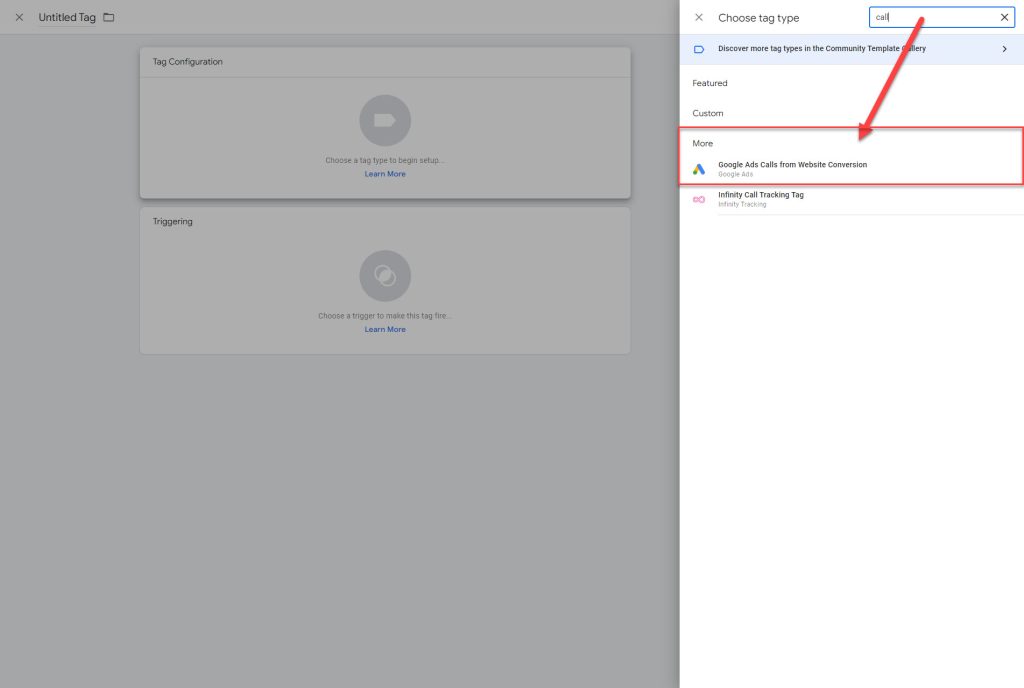
Step 9: Click on “Tag Configuration”.
Step 10: Because this goal is not immediately visible, we’ll use the search function in the top right to get to it quickly.
Step 11: Just by putting “call” into the search box, you’ll now see the Tag “Google Ads Calls from Website Conversion”. Let’s click on that.
Step 12: Go ahead and copy/paste the Conversion ID and Conversion Label from Google Ads (from Step 7).
Step 12: Click on “Trigger” and select “All Pages”.
Step 13: Give your Tag a name and click Save in the top right corner.
Great, the tag is there – but it’s not going to work for this client just yet because I haven’t set up a “Conversion Linker”.
Conversion Linker
Step 14: Create a new Tag and click “Conversion Linker”
Step 15: Make sure that you tick “Enable linking on all page URLs”. Then, select “All Pages” under Triggering.
And of course, don’t forget to Publish all of your changes in Google Tag Manager afterwards.
There are a lot of guides online on how to set up conversions in GA4 and Google Tag Manager, many of them confusing to those who aren’t already familiar with the newer generation of Google products.
In this guide, we’ll show you how to set up tracking for telephone link clicks in GA4 using the most simplistic approach possible.
To avoid additional complications, this guide does not show you how to test/preview the goal.
However, this is a very straight forward conversion event to set up and there are no circumstances where this goal won’t work.
Therefore we don’t need to preview/test that the goal is working.
First off, we’ll need two things:
A Google Tag Manager (GTM) account
A Google Analytics (GA4) account
Both of these are free, quick and easy to set up.
Then, you’ll need to do two things:
Install the GTM code on your website (instructions post to come)
Link GA4 to GTM (instructions post to come)
With all of the above completed, we can begin:
Instructions
Step 1: Go to the Trigger section in GTM and click “New”.
Step 2: We need to name our trigger, so let’s call it something like “Tel Link Clicks”. What you name this tag doesn’t impact tracking so name it whatever you prefer.
Step 3: Click on the white box that asks you to choose a trigger type.
Step 4: A new menu will appear on the right hand side. Let’s click “Just Links”.
Step 5: We need to select “Some Link Clicks”.
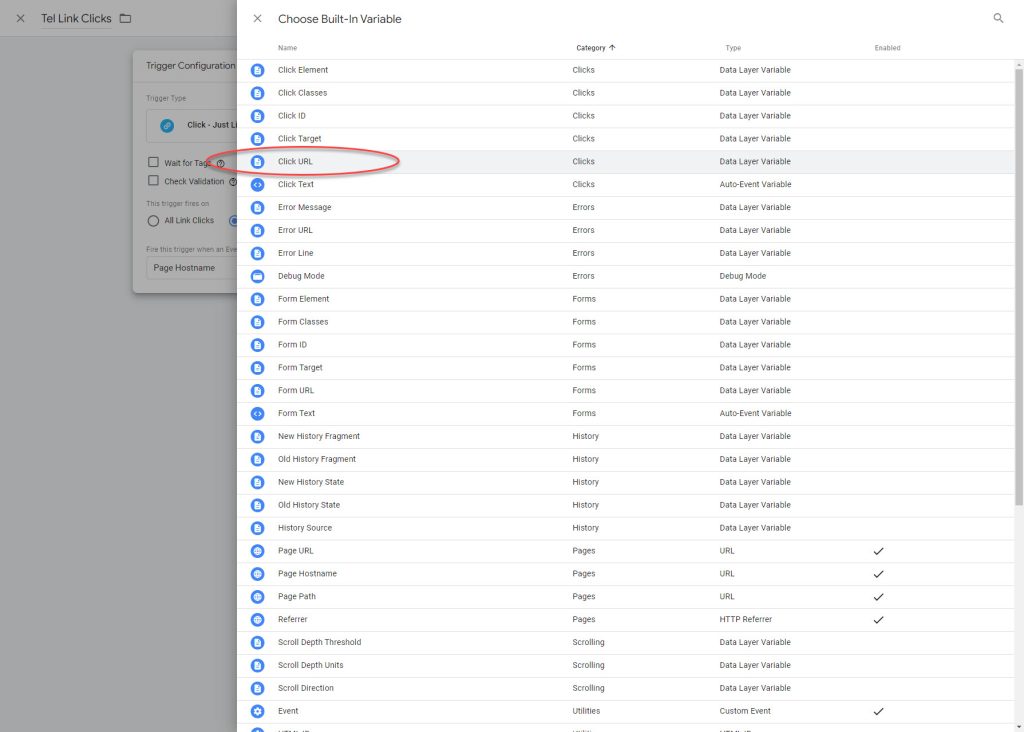
Step 6: By default on a new account, your first condition will be “Page Hostname”. We need to change it to Click URL, which doesn’t appear in the drop down menu, so let’s add it in. Click on “Choose Built-In Variable” from the dropdown box.
Step 7: A menu will appear on the right hand side. Click on “Click URL”.
Step 8: In the third conditions box, add in “tel:”. By doing this, you will track all telephone number links that are clicked on. Then click the “Save” button on the top right of your screen.
Step 9: Great, your trigger is set up. Now let’s go over to “Tags” area through the menu on the left hand side of your screen.
Step 10: Click on the “New” button.
Step 11: Just like before, input a name (eg. Tel Link Clicks) and click on the first white box.
Step 12: A menu will appear on the right hand side. Select “Google Analytics: GA4 Event”.
Step 13: On the “Configuration Tab” drop-down box, click on your linked GA4 configuration.
If you haven’t linked GA4 yet, you can follow this guide here: [LINK TO COME]
If you’re just linking GA4 now, stop what you’re doing, set up the GA4 configuration and then return to Step 10.
Step 14: Populate an “Event Name” such as “tel_link_clicks”.
Step 15: Now, whilst we’re finishing this Tag off, we need to open GA4.
Go to the Admin menu (the little blue cog in the bottom left), then Click on “Conversions”, then “New conversion event”.
Step 16: Once you’ve clicked on “New conversion event”, you will be asked to enter “New event name”.
This name must match the name “Event Name” that you entered in our GTM Tag back at Step 14.
If these names do not match exactly, the information will not get pushed from GTM to GA4 and the conversion tracking will not work.
Enter the event name and hit “Save”.
Step 17: Great! You’ve set up the new conversion event in GA4. But it won’t work just yet.
Now we have to return to Google Tag Manager (GTM) to finish off the tag.
Step 18: Back in GTM, we’re going to finish setting up the Tag that we started back at Step 14.
Click on the bottom white box to select what will trigger this Tag.
Step 19: A menu will appear from the right.
Select the “Tel Link Clicks” Trigger (if you named the Trigger differently back in Step 2, it will appear under that name).
Step 20: This is how your completed Tag Configuration should look.
Now hit the “Save” button.
Step 21: Congrats! You’ve set up the tag!
Now all that’s left to do is hit “Publish” on the top right hand corner.
When engaging in a digital marketing service such as SEO or Google Ads, one of the first things you’ll be asked for is access to your Google Analytics account.
If you already have an account and unsure how to add users, or what permissions you should be giving them, here’s a step by step guide below.
Step 1: Logging Into Google Analytics
First, you need to be logged into the Google account that is connected with your Google Analytics account.
Either log in first and go to: https://analytics.google.com
Or go to https://analytics.google.com and log in from there.
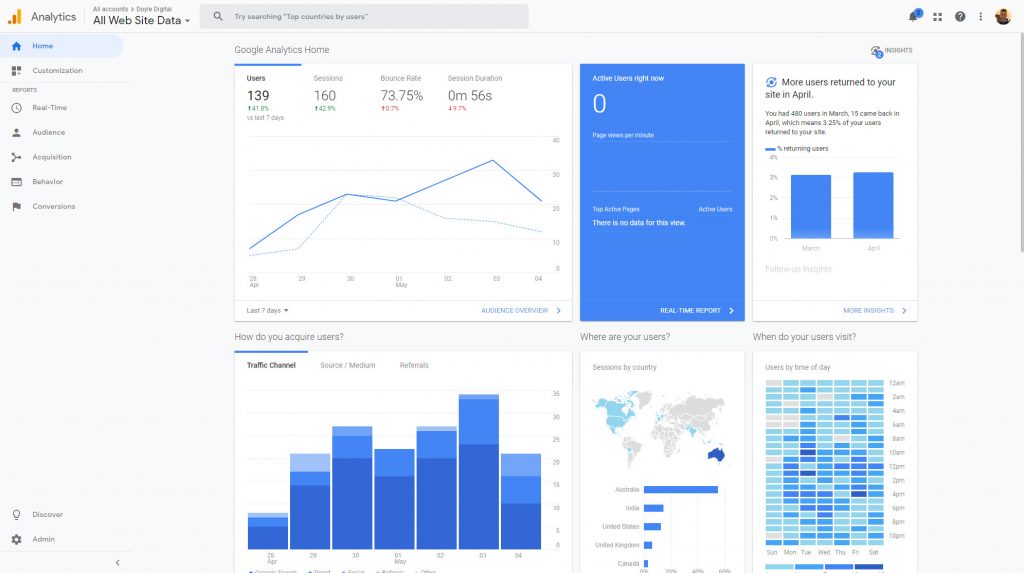
Once you’re logged into the right account, you should see a dashboard that looks similar to this:
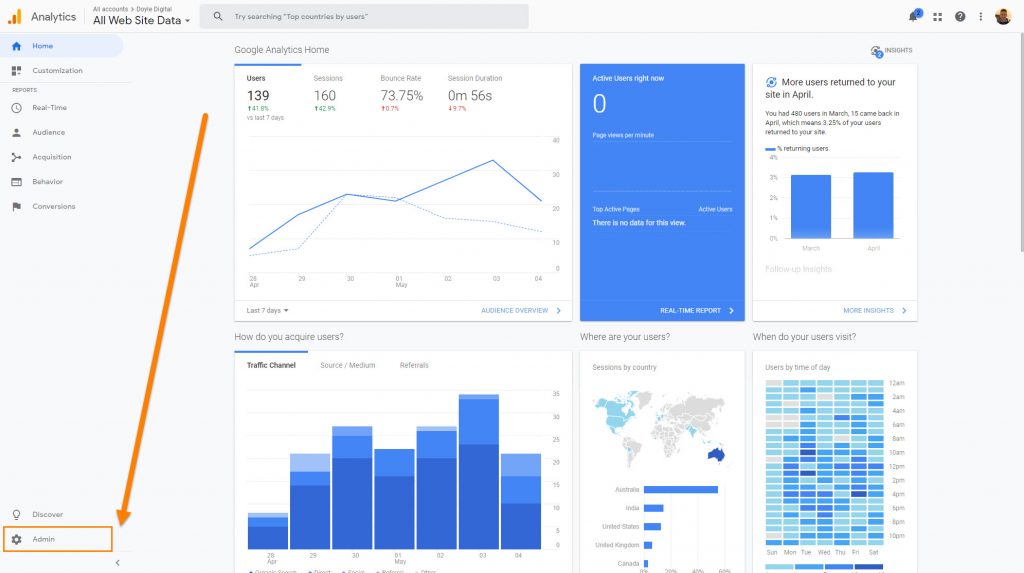
Step 2: Go To The Admin Panel
In the bottom left of your screen, there is a little cog icon with and the words “Admin”.
Click on that to go to the Admin Panel.
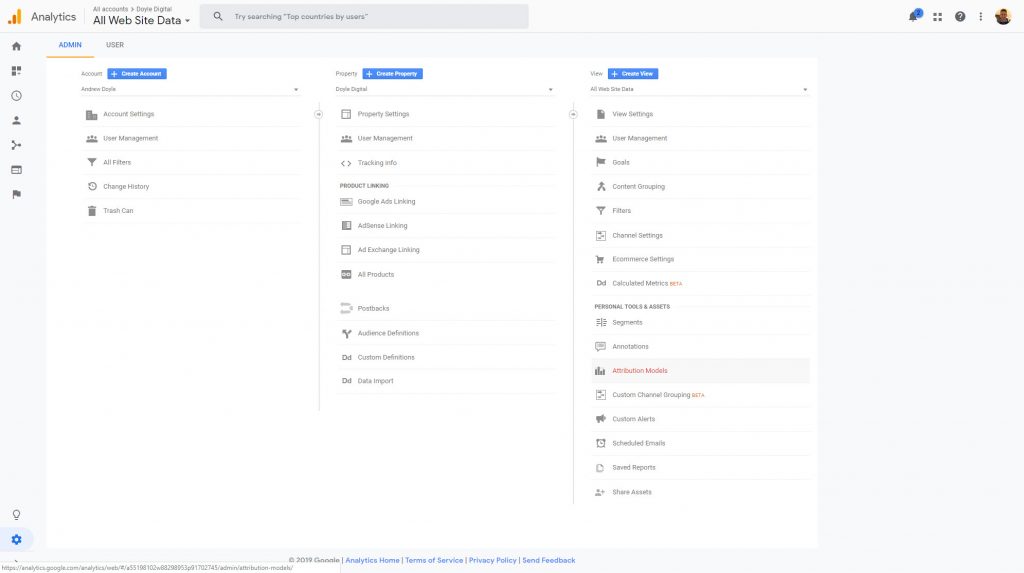
Once you’ve clicked on the Admin tab, you should see your Admin panel like so:
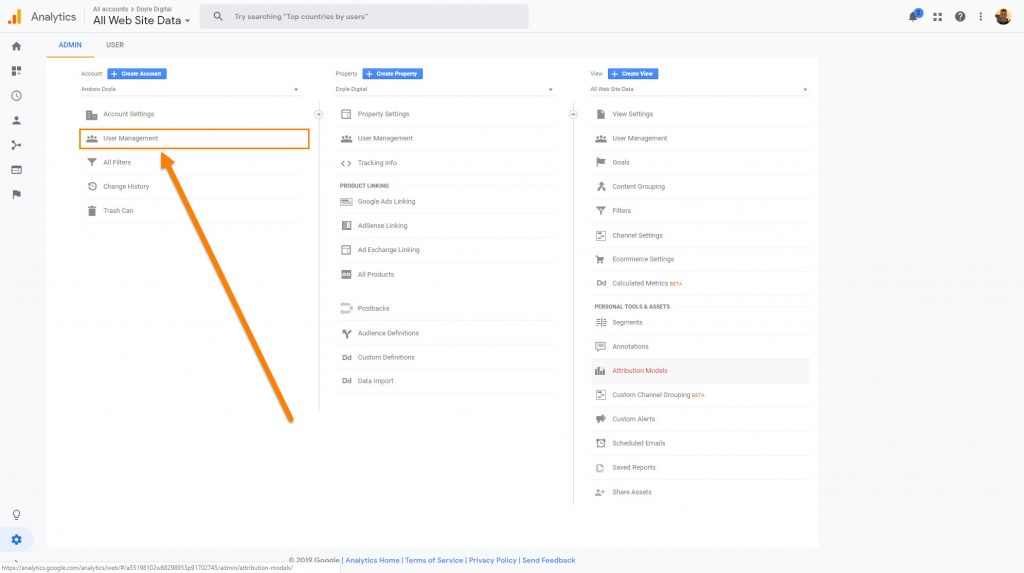
Step 3: Click User Management
You will see three different panels from left to right.
Account, Property and View.
Typically you will want to give access to the Property level at the bare minimum if you want a digital marketing provider to be able to do things such as link up your Google Ads account to your Google Analytics account.
In this example, we’re going to provide access to the Account level (which is the highest level of access to the account).
If you wish to provide access at the Property or View level, just click “User Management” under the Property panel or the View panel, respectively.
The steps going forward are exactly the same, regardless of which level you’re providing access to.
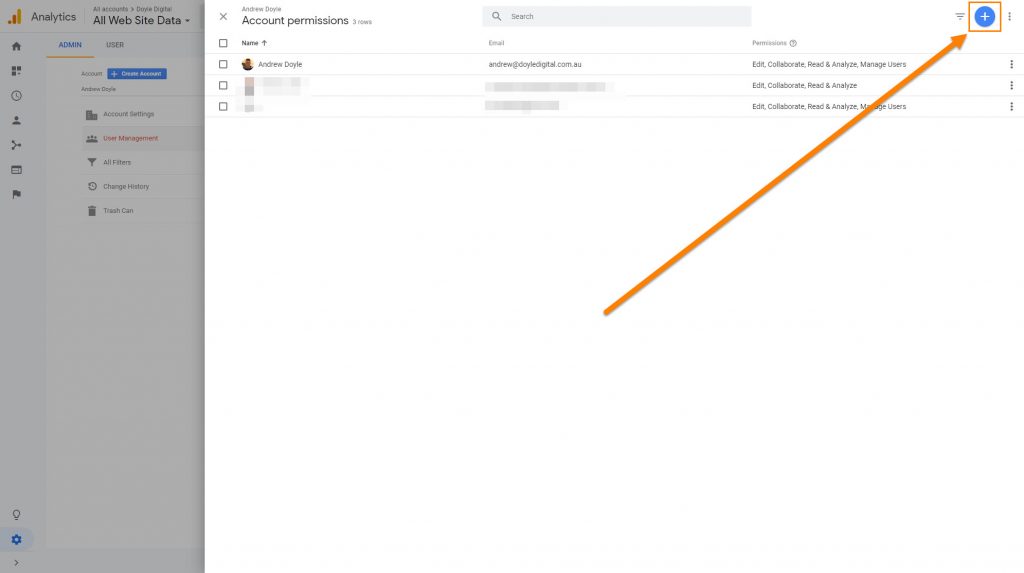
Step 4: Click Add Users
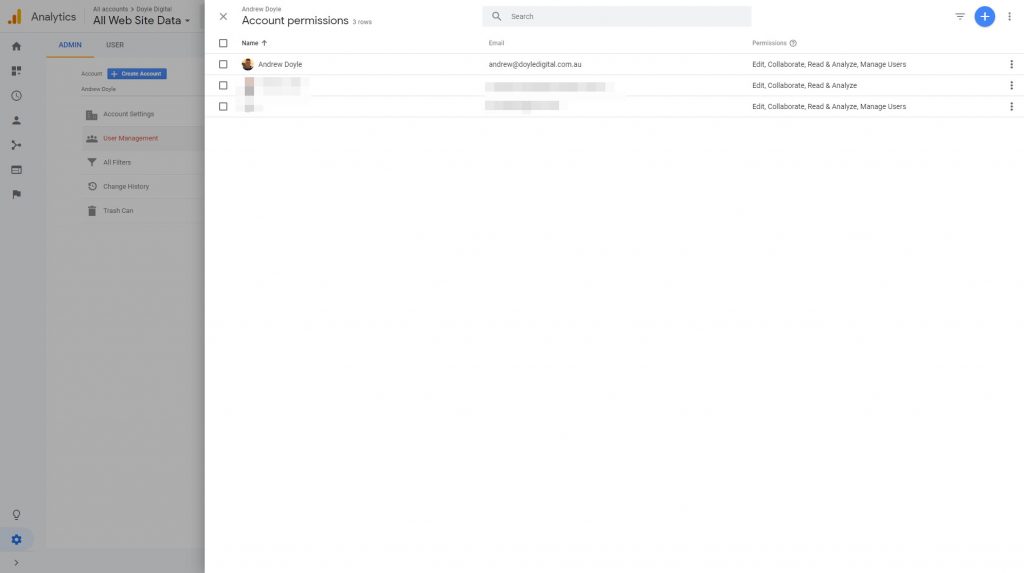
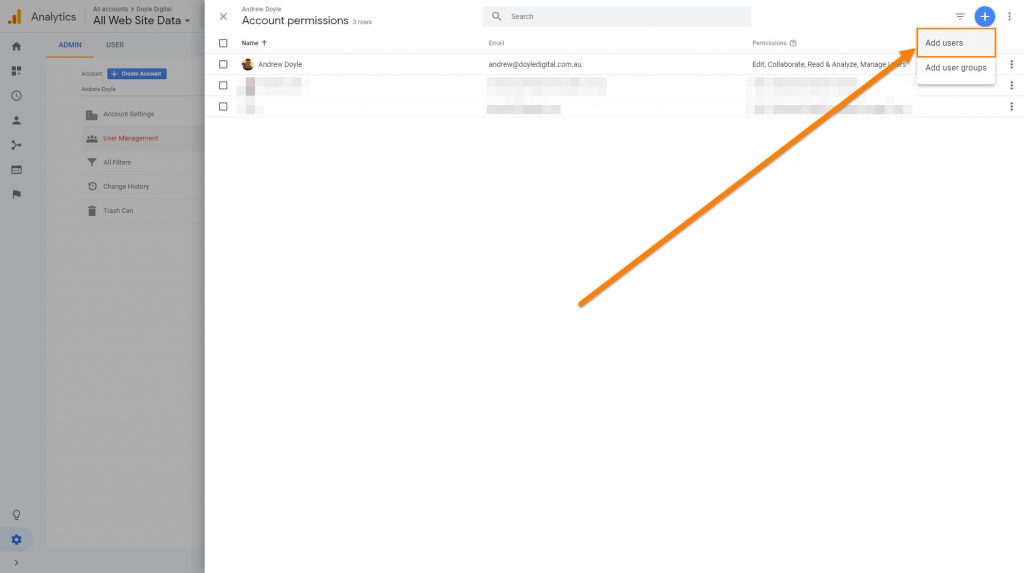
Once you’ve clicked on User Management (regardless of whether it was under Account, Property or View), you will be greeted with this screen:
Now, there is a small blue circle in the top left with a white + on the middle.
We’re going to click on that:
And on the little drop down box, we’ll click on “Add Users”
Step 5: Choose Permissions
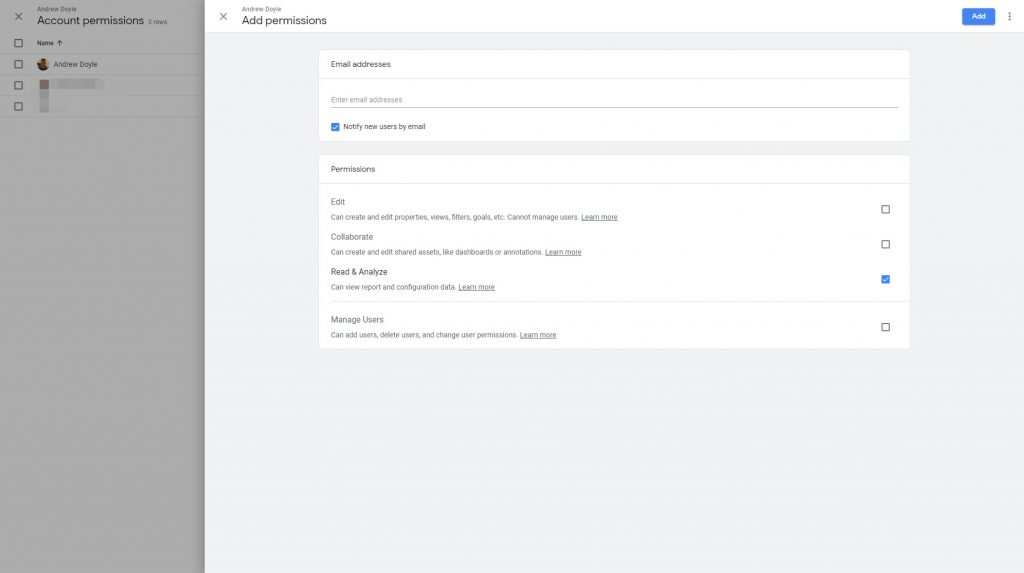
Once you’ve clicked Add Users, you will be greeted with this screen:
This is where we need to pay attention a little bit to ensure we’re giving the right level of access here.
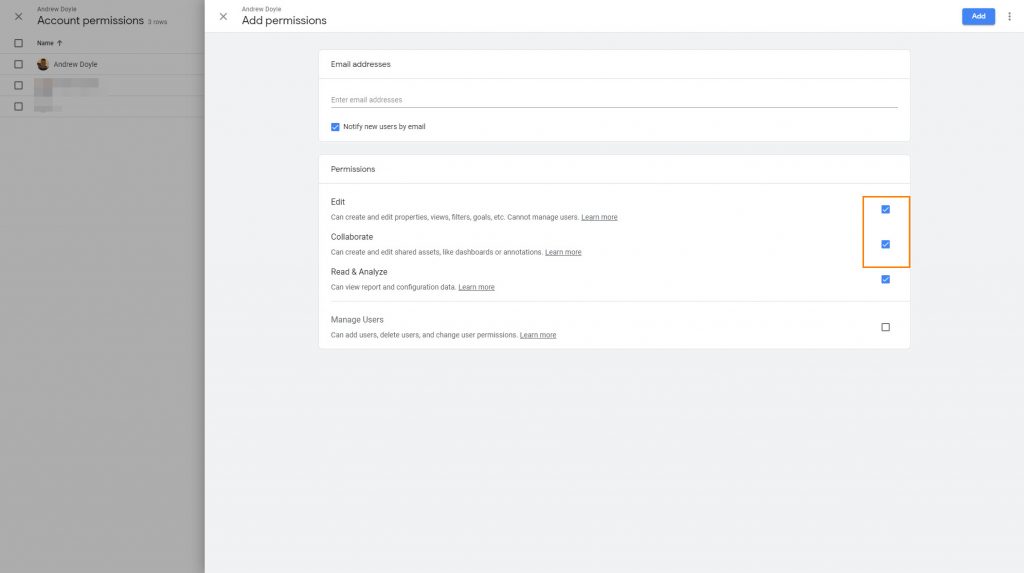
In most cases, you want to tick the “Edit” and “Collaborate” boxes which will allow your digital marketing provider to perform all the tasks that they need to.
Warning: If you click on the “Manage Users” box, you are giving this new user the ability to add any other users that they like and allows them to remove users, including yourself.
“Manage Users” at the Account level should only really be provided to people within your own organisation and not to external providers as a security measure.
Some SEO companies may demand full admin access. They don’t need it.
If an SEO claims that they need to have full admin access to access Google Search Console, there are other methods that they can use to claim it.
Step 6: Add E-Mail Address
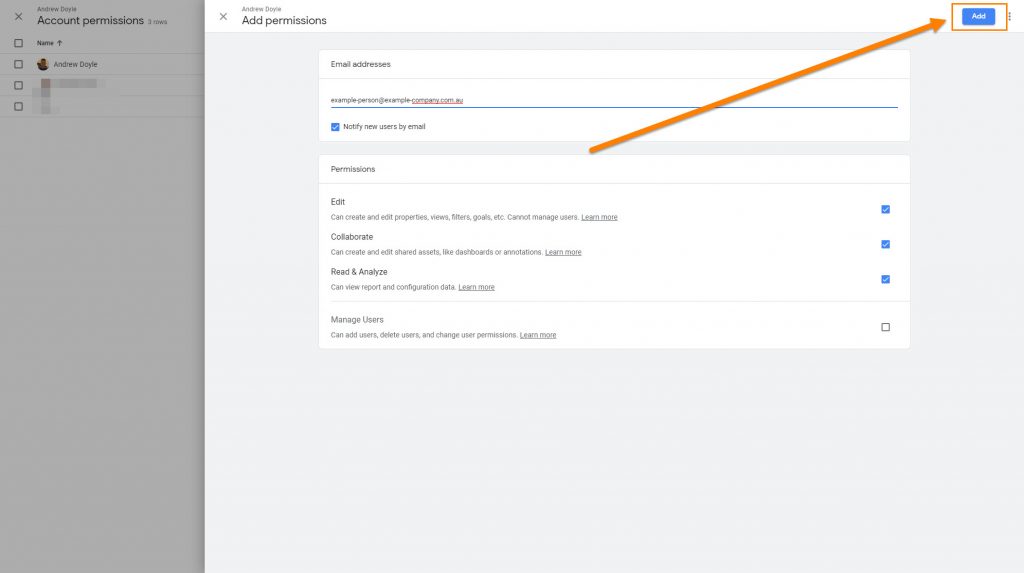
Once you have selected which permissions you would like to provide, go ahead and enter their e-mail address in the line towards the top.
Once you have entered the e-mail address, you just need to click the “Add” button to finalise everything.
The “Add” button is at the top right of your screen.
Providing that there is a Google account associated with that e-mail address, that’s everything that you need to do to provide access to Google Analytics!
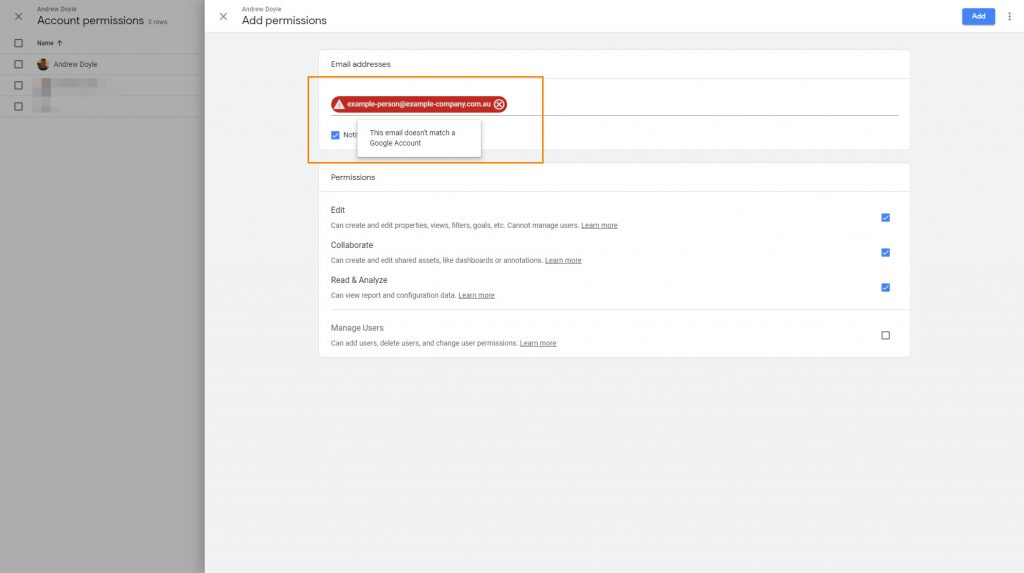
Error: This E-Mail Doesn’t Match A User Account
If you have entered an e-mail address and the e-mail address is surrounded in a red box, it can mean either one of two things.
The e-mail address you entered may have been wrong or have typos
The e-mail address doesn’t have a Google account associated with it
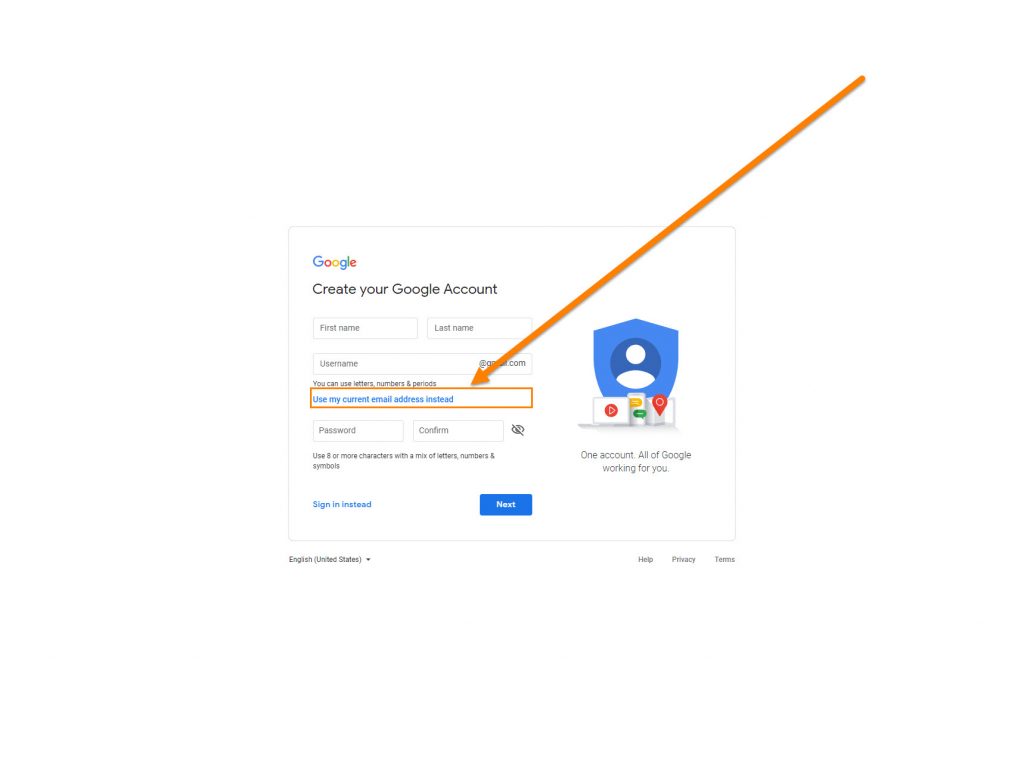
If there is no Google account associated with the e-mail address, the user will have to sign up to Google using that e-mail address.
You don’t have to create a Gmail address to sign up to Google.
Even if you have a Hotmail or business e-mail account, you can still sign up to Google’s services with that e-mail address.
To sign up to a Google account with your existing e-mail address, follow the prompts to Sign In, Create An Account and then click here on the sign up page: